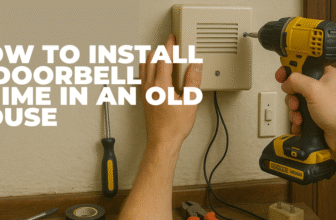
Replacing your wired doorbell chime might sound like a big job but it is actually easier than you think. Whether you are upgrading your chime or replacing a broken one. It is something you can do on your own. Just remember to turn off the power, label the wires and follow the instructions carefully. Securely mounting the new chime and double-checking all the connections. You will have a fully functional doorbell in no time. Let’s get started with the basics to make it simple!
Understand the Wiring Labels like Front, Rear and Trans
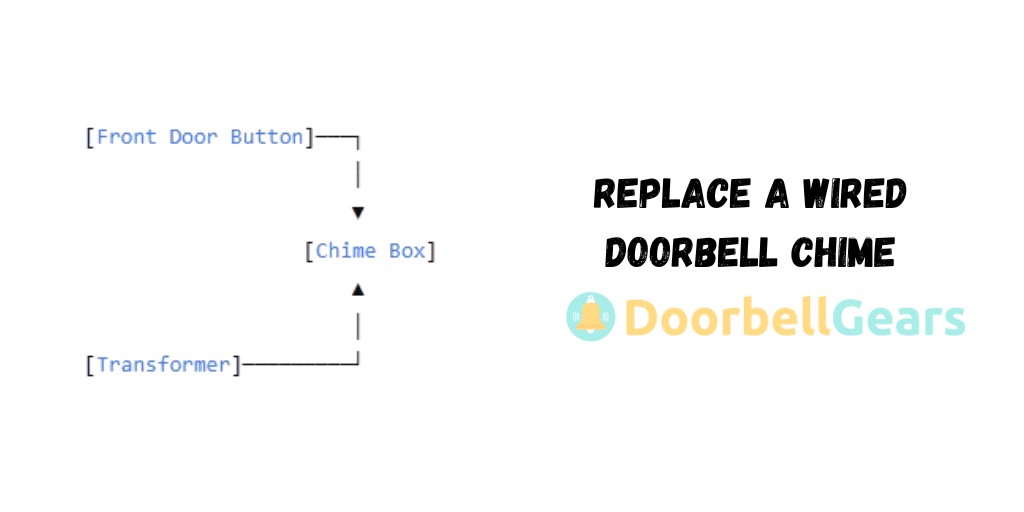
When you are connecting your new doorbell chime. You might see labels like Front, Rear and Trans on the terminals. These tell you where each wire goes and what it controls:
Front Terminal
The Front terminal connects to the wire from your front doorbell button. When someone presses the button, it sends a signal to make the chime ring. This is the most used terminal. Most homes only have one doorbell, so this is the one you will likely use. It plays the regular chime for the front door. Make sure the wire is attached tightly so it works properly.
Rear Terminal
The Rear terminal is for a second doorbell button. This button is usually at the back or side door. It works like the front button but makes a different sound. Often it rings just once instead of a full chime. This helps you know which door someone is at. Some homes don’t have a second button. If yours doesn’t, you can skip this terminal.
Trans Terminal
The Trans terminal stands for transformer. This is where the power comes from. A wire here sends low-voltage power from the transformer to the doorbell system. It does not make a sound. It just gives power to the chime and buttons. Without this wire, the doorbell will not work. Make sure it is connected well and not damaged.
Simple Step-by-Step Guide to Replacing a Wired Doorbell Chime
You don’t need to be an expert to replace a wired doorbell chime. It’s something you can do yourself with a little care. First, turn off the power at your circuit breaker to stay safe. Once the power is off, unscrew the old chime and gently remove it from the wall. Carefully disconnect the wires. Next, take your new chime and connect the wires to the correct spots, following the labels or instructions. Make sure each wire is tight and secure. After that, screw the new chime onto the wall. Finally, turn the power back on and press the doorbell to see if it works.
Tools You will Need:
Flathead and Phillips screwdrivers
Voltage tester
Drill (optional)
Wire strippers (optional)
Electrical tape or wire nuts
Step ladder
1. Turn off the power
Go to your circuit breaker and turn off the power for the doorbell. This is a very important safety step. Never touch wires while the power is still on. Use a voltage tester to make sure the power is really off before you begin.
2. Remove the old chime
Use a screwdriver to take off the old chime. Pull it gently away from the wall so you can see the wires behind it. Loosen the screws that hold the wires and disconnect them. Try not to let the wires fall back inside the wall.
3. Check your new chime
Look at the instructions that came with your new chime. They will tell you where each wire should go. Some chimes have labels like “Front” or “Trans.” Match each wire to the correct spot. Make sure you have all the parts you need.
4. Connect the wires
Attach each wire to the right terminal on the new chime. Use a screwdriver to tighten the screws so the wires stay in place. If the ends of the wires are damaged or too short, use wire strippers to clean them up. Double-check that all wires are connected securely.
5. Mount the new chime
Gently tuck the wires back into the wall. Line up the new chime with the screw holes. If they don’t match, you may need to drill new holes. Use screws to attach the chime to the wall. Make sure it’s straight and secure.
6. Turn the power back on and test it
Go back to the circuit breaker and turn the power back on. Then press the doorbell button to see if it rings. If it doesn’t work, turn the power off again and check the wire connections. Once everything works, you’re done!
What to Do If You Have Multiple Doorbell Buttons
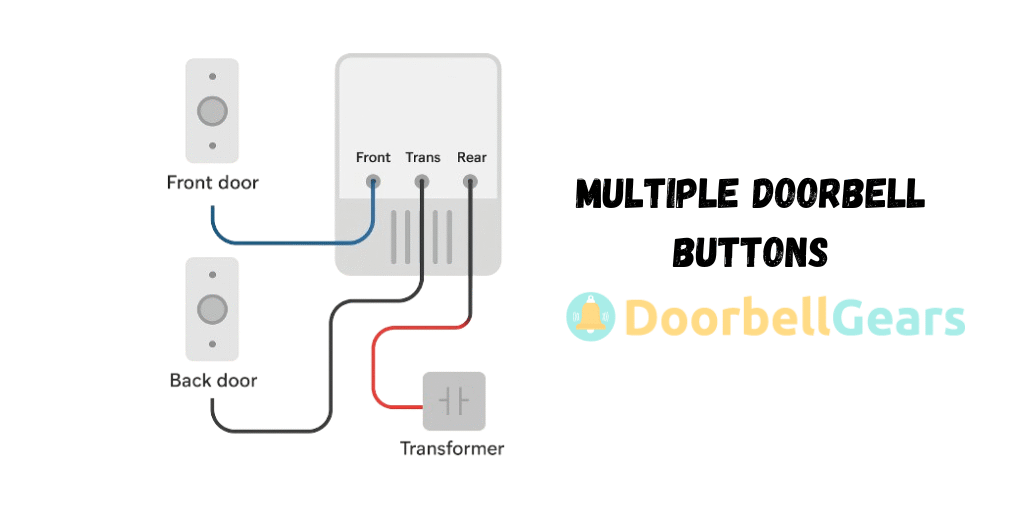
Some homes have more than one doorbell button. One might be at the front door. Another could be at the back or side door. Each button needs to be wired the right way to work. First turn off the power at the breaker. Then remove the old chime and look at the wires. You should see one wire for the front button and one for the back. These usually connect to spots marked Front and Rear. When you put in the new chime, match each wire to the same terminal. The front wire goes to Front. The back wire goes to Rear. This helps the chime play different sounds for each door. Also connect the Trans wire. This is the power wire for the whole system. After all the wires are connected turn the power back on. Press both buttons to make sure the chime works.
Take a photo before removing wires
Use small stickers or tape for wire labels
Don’t force the wires
Test both buttons after installing
Keep wires neat inside the wall
Double-check terminal labels on the new chime
Common Mistakes to Avoid
When installing or replacing your doorbell, always turn off the power at the circuit breaker first. Label the wires to avoid mixing them up, and ensure the Trans wire is connected for power. Double-check wire connections, read the instructions, and securely mount the chime before testing both buttons.
Not turning off the power
Always switch off the power at the circuit breaker before working on your doorbell. It’s easy to forget, but it’s crucial for your safety. Live wires can cause electric shocks or even fires. Use a voltage tester to double-check that no power is running through the wires. Never assume the power is off just because the breaker is switched off.
Mixing up the wires
Before disconnecting anything, make sure you know which wire goes where. If you are unsure label the wires with tape or small stickers. This will help prevent mistakes when reconnecting them. Mixing up the wires can make the doorbell stop working or cause it to malfunction. Taking a photo before removing the old chime can also help you remember the correct setup.
Forgetting the Trans wire
The Trans terminal is important because it brings power to the chime from the transformer. If you forget to connect this wire, the chime won’t work at all. It’s easy to overlook, but don’t forget to attach the Trans wire to its correct terminal. Without it, neither the front nor rear button will trigger the chime.
Loose wire connections
Loose wires can stop your doorbell from working properly. When you connect the wires to the terminals make sure they’re tightly secured. Use a screwdriver to tighten them well, so the wires are held in place. Loose connections can cause the chime to work only sometimes or not at all. Double-check your connections before fixing the chime to the wall.
Skipping the instructions
Every doorbell system is different. Even if you’ve installed one before, always check the instructions that come with your new chime. The wiring instructions, labels, or installation method might differ. Skipping the manual can lead to confusion or mistakes. It only takes a few minutes to read through, and it can save you time and frustration later.
Poorly mounting the chime
If the chime isn’t mounted properly, it may be loose or crooked. When installing, make sure it’s level and securely attached to the wall. If the screw holes don’t line up with the new chime, you may need to drill new ones. A chime that’s not mounted correctly can look unprofessional and affect how well it sounds when it rings.
Not testing both buttons
After everything is connected test both the front and rear buttons. Sometimes the front button works, but the rear one doesn’t, or vice versa. Don’t skip this step. Press each button to make sure it triggers the right sound. If one button doesn’t work, double-check the wire connections to ensure everything is in the right place.
FAQ
Should I turn off the power before replacing the doorbell chime?
Yes. Always turn off the power at the breaker box. This helps you stay safe and avoid electric shocks.
How do I know where each wire goes?
Before you remove anything take a photo or use tape to label each wire. That way you can match the wires to the right spots on the new chime.
What is the Trans wire for?
The Trans wire brings power from the transformer. If you forget this wire the doorbell will not work.
Can I install a new chime if I have two buttons?
Yes. Most chimes have spots for both front and back door buttons. Just connect each wire to the right terminal so the chime can tell which button was pressed.
What if the new chime does not work after I install it?
Check all the wires and make sure they are tight and in the right place. Turn the power back on and test both buttons. If it still does not work look at the manual or ask for help.
Conclusion
Change your wired doorbell chime can make your home feel and sound better and you do not need an expert to do it. It is a small upgrade that adds a modern touch and helps you hear visitors more clearly. If you are ever unsure, check the manual, watch a how-to video or ask someone at your local hardware store. Help is easy to find and with a little guidance, you can do it yourself with confidence.


I am David Echols working with doorbellgears.com. I and my team of experts have been working in the security industry for 10 years and have a wealth of knowledge when it comes to doorbells, security cameras, video doorbells, door chimes, intercom doorbells, and others. My team is confident in their ability to provide helpful reviews and blog content that will assist readers in resolving security issues in their homes and offices. Honestly speaking, they are passionate about helping people to find the right security solution for their home or office. In this blog article, we discuss some new gadgetry that can be used to improve indoor security. If you're looking for some new gadgetry to improve your home security, then David Echols is definitely the person to ask! Our Areas of Expertise Home security products, Smart home devices.