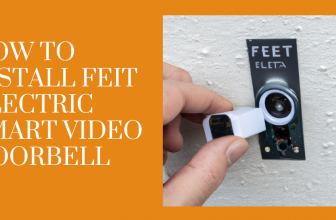
Wireless doorbells are great if you don’t want to mess around with electricity. It is more convenient if you don’t own the house. Whether you are installing a wireless doorbell for your home or office, setting these up will only require less than an hour of time and can be done single-handedly.
You can obviously figure out yourself how to install a doorbell, but reading an article can help you avoid some newbie mistakes. Therefore, we recommend you read our guide first before starting your installation process. Hopefully, this will be a very simple and straightforward guide on how to install a wireless doorbell.
Reading the user manual can help
It might not sound like a very useful tip. No one wants to read user manuals, especially not for something this simple. However, not all models are the same. Depending on the company and the model you choose, your doorbell might have different features that need specific instructions. So, we recommend you at least take a glance into the manual.
Instructions for installing the chime box
Regardless of what brand you choose, installing a wireless doorbell is fairly straightforward. All you need to do is a little bit of planning and find the right location.
Adjust the setting before installation: You will only put yourself through more unnecessary extra work if you don’t set up the features beforehand. The chime box will have settings for changing the tone. And more modern ones will let you even adjust the volume.
First, insert the batteries. Usually, you will need 2 to 3 D batteries. Depending on the power consumption of the system, the batteries should last about 2 to 3 years. Similarly, put the batteries into the ring button and check if the system is synced together.
Then, pick the sound as per your taste. If your system has volume settings, we recommend putting the volume to max level. By doing so, you will increase your chances of not keeping your guests waiting outside the door. Unless you have a very small house or there is a specific reason, keep the volume up.
Find the appropriate location for the chime box: It is really important that you should be able to hear the sound regardless of where you are in the house. Try to find a suitable spot that is close to the center of the room and in an open place. This will help distribute the sound evenly.
Mount it close to the ceiling: Putting the chime box along with your other furniture can block the sound range. Placing it at a higher wall will ensure nothing is blocking the signal and also no one is able to drop it by mistake.
Most doorbell systems should come with double-sided tape for the chime box and a wall mounting bracket for the ring button. We will go into installing the ring button later in this article.
Once you have decided the location, next is use the tape and stick it to the wall. Please note that not all doorbell systems will come with double-sided tapes. Many require to drill into the wall and install a bracket. Drilling isn’t that difficult, you don’t need a technician for it. If you don’t own one, just borrow a drilling machine from someone and use it.
Setting up the ring button/switch
Most ring switches will have holes in their casing for mounting onto walls. If it doesn’t have any mounting holes, it should definitely come with strong double-sided tapes. We would recommend avoiding models with tape support, as these aren’t reliable for long-term use. Bad weather can also affect its adhesive strength.
Insert the battery: Usually, batteries for the switch will come inside the box. These are small circular lithium batteries that should last at least a year or two before needing to be replaced. These batteries are flat and not very usual to understand which side goes where. So check for the labels or see the manual for battery insertion.
Choose the appropriate spot: You will need to consider the distance between the chime box and the remote before mounting it permanently. We recommend first mounting the switch then setting up the chime box. As the switch is the crucial component guests will click on. The box can be then adjusted based on the range.
Make sure the height is at reach for most people: If you place the switch too high, then shorter people will have a tough time reaching it. Also, it should be easily accessible for people in wheelchairs. So think about that and locate the appropriate position.
Consider the surface for mounting the switch: Wood, vinyl, stone, ceramic, etc., are acceptable for placing the switch. However, for brick walls, you will need to use plastic to properly tighten the screws, otherwise, over time it can slowly loosen its integrity. Moreover, avoid using metal surfaces, as it most likely will block the signal. Make sure even inside the house, there isn’t any metal object directly between its range. Finally, check if the company has any other issues mentioned on their site that you need to avoid.
Some things to keep in mind
If you are concerned with longevity, then there are certain things you will need to keep in check. The battery will corrode after a few years of use. That corrosion will also damage the internal components. So don’t wait for the battery to die. Change it slightly earlier before the recommended period for the battery’s capacity. Plus, clean the whole system once every few months to keep it in its pristine condition.
Our recommendations
If you want low-cost affordable doorbells, then consider reading our article on the Best Wireless Doorbell for Your Home. Here you will get recommendations on some of the best doorbells that offer great value for the money. Also, this article won’t be complete without recommending a drill to complement your setup process. The DEWALT XTREME MAX Cordless Drill is something every household should have. It is affordable and will make your drilling tasks much easier.
Conclusion
Installing a wireless doorbell is very easy, even for beginners. You don’t need any professional assistance. The only thing you need is a drill and a general idea of how to perform such simple tasks. Watching a video or reading an article like ours will make the process much simpler. There are countless systems you can choose from, and most are fairly cheap. One important note is that you should at least look into the instructions of your particular unit to know how the wireless doorbell works. That being said, we hope this instruction was useful for you. Consider reading our other articles for more helpful guides and reviews.